How to add many2one field on odoo website or controller

There was a time when i had client which needed a custom page where their customers could create a support ticket. One of the requirements was to let users choose a person to assign the ticket to, essentially a drop down menu on res.users model. I struggled with this initially, but after some time, I found a solution that is simpler. Therefore today, I’m sharing this solution as part of my ongoing mission to keep odoo coding stress-free 😄.
Step 1 Create a controller function.
from odoo import fields, models, api , _ ,http
from odoo.http import request

class GetTickets(http.Controller):
    @http.route(['/my_ticket',], type='http', auth='user', website=True)
    def get_tickets(self,):
          #get all users available
        res_users = request.env['res.users'].search([()])
          #send them to the page which want them displayed
        return request.render('ticket_module.my_ticket_template', {
            'res_users': res_users,
        })
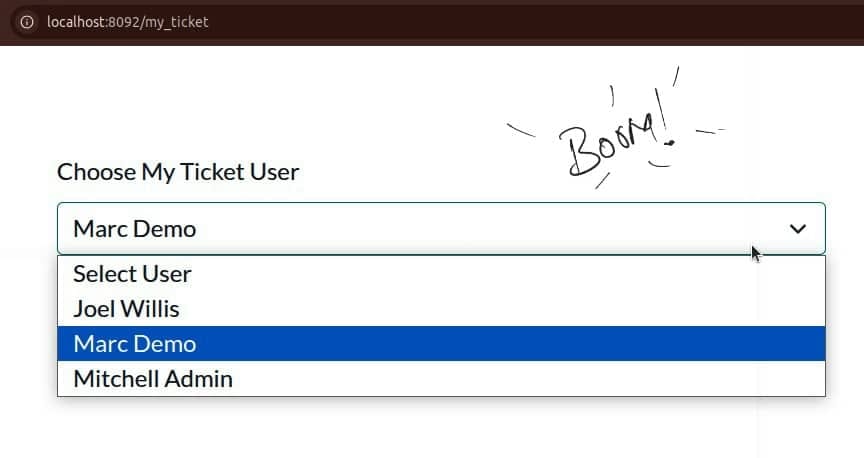
So the catch here, we simply search for all users in res.users and pass that list to the template as a dictionary. This makes it easy to access the data on the website. Step 2 Display them on the Controller or website.
<?xml version="1.0" encoding="utf-8"?>
<odoo>
    <template id="my_ticket" name="My Ticket Page">
        <t t-call="web.html_container">
            <div class="container">
                <div class="mb-3 col-6">
                      <label for="ticket_user" class="form-label">Choose My Ticket User</label>
                      <select class="form-select" name="ticket_user" id="ticket_user" required="required">
                          <option value="">Select User</option>
                          <t t-foreach="res_users" t-as="user">
                              <option t-att-value="user.id">
                                  <t t-esc="user.name"/>
                              </option>
                          </t>
                      </select>
                  </div>
            </div>
        </t>
    </template>
</odoo>
Thanks to Odoo’s templating features liket-foreachandt-att-value, the dropdown is populated dynamically, giving users a clear and straightforward way to make their selection.
Step 3: Handle the Form Submission
After the user selects an option, the next step is to send this data back to Odoo via a form submission. Wrap your dropdown inside a <form> tag that points to your submission controller:
<form class="row g-3" action="/submit_ticket" method="post" enctype="multipart/form-data">

      <!--dont forget to add selection option inside here-->

      <button class="btn btn-secondary me-md-2" type="submit">submit_ticket</button>
</form>
Then, create a corresponding controller to process the submitted data:
 @http.route('/submit_ticket', auth='user', methods=['POST'])
    def submit_ticket(self, **kw):
        res_users_id = kw.get('res_users')
        print("res_users_id")
Notice that the <select> tag is set to "user.id". therefore it will send the. id of the user over POST request and our controller retrieves it using kw.get('res_users').
This allowed me to successfully implement the customer requirement. If you encounter any issues while trying to achieve this, feel free to start a conversation in the section below I’d be happy 😺 to help. Till next time, happy coding without burnout!
